Overview
The InsForge MCP server gives your AI coding assistant direct access to your backend: database queries, schema management, storage, and more. Follow the instructions below for your AI client. Don’t see your tool? Browse the agent directory for the full list of tested integrations.Prerequisites
- An AI coding assistant (Cursor, Claude Code, GitHub Copilot, etc.)
- An InsForge project - create one here if you haven’t already
Local MCP configuration (recommended)
If you prefer to configure MCP locally, select your AI coding assistant below:Cursor
Cursor
Installation
You can one-click install the MCP server in Cursor by clicking the “Add to Cursor” button in the screenshot below:
- Open Cursor Settings
- Go to Tools & MCP
- Click New MCP Server (Add a Custom MCP Server)
- Paste the MCP JSON from your InsForge project
- Save the configuration file
- You should see a green dot, indicating InsForge is installed successfully
Verify installation
To verify the connection, start a new chat session in Cursor and send this prompt to your agent:Claude Code
Claude Code
Installation
Add the InsForge MCP server to your Claude Code:- Select Claude Code in the dropdown list
-
Copy and paste the following installation command in your terminal
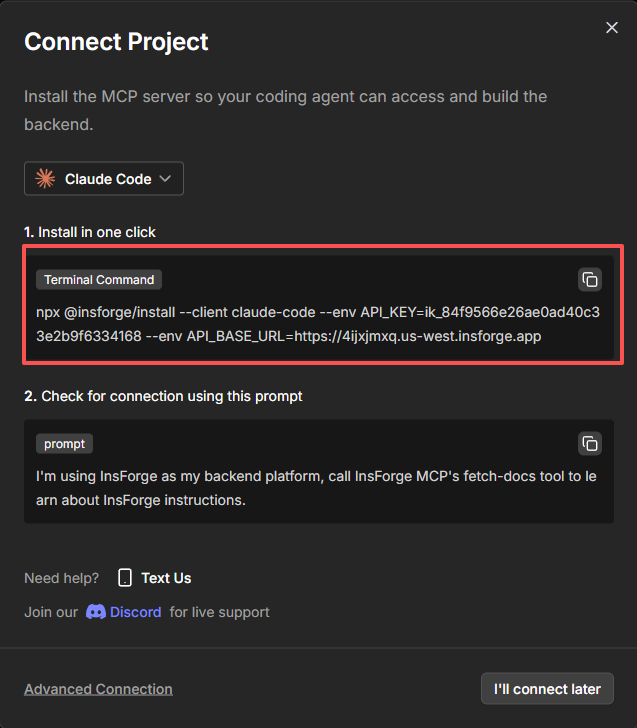
- Run the command
Verify installation
To verify the connection, start a new chat session in Claude Code and send this prompt to your agent:GitHub Copilot
GitHub Copilot
Installation
Add the InsForge MCP server to your GitHub Copilot:- Select Copilot in the dropdown list
-
Open the terminal and paste the following installation command in your GitHub Copilot terminal
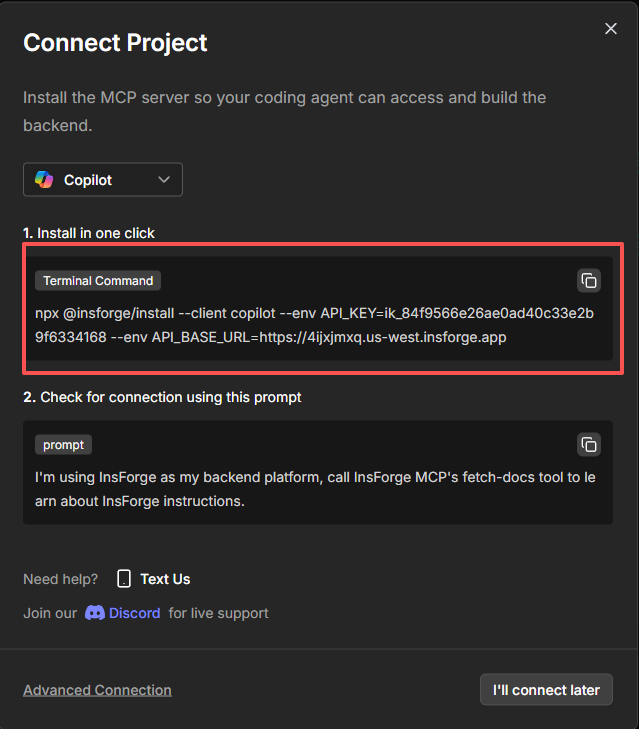
-
Run the command

Verify installation
To verify the connection, start a new chat session in Copilot and send this prompt to your agent:
Google Antigravity
Google Antigravity
Installation
Add the InsForge MCP server to your Antigravity:- Select Antigravity in the dropdown list
-
Copy and paste the following installation command in your Antigravity terminal
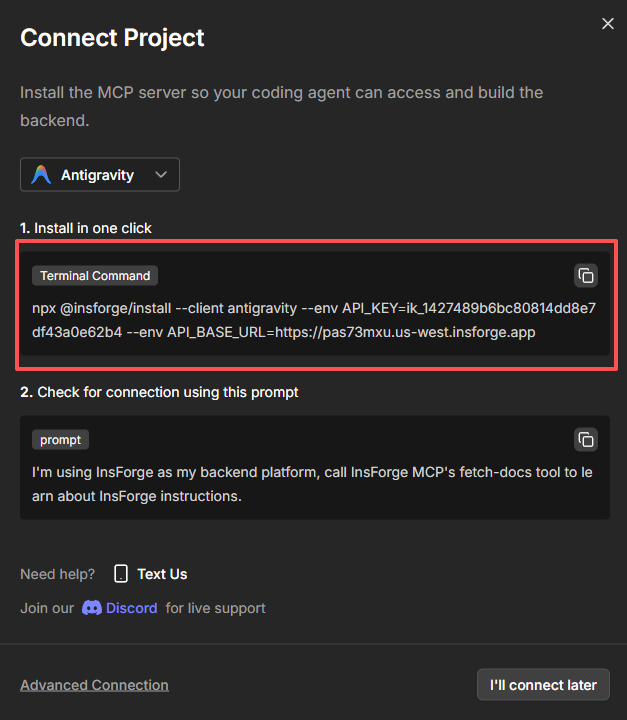
- Run the command
Verify installation
To verify the connection, start a new chat session in Antigravity and send this prompt to your agent:Kiro
Kiro
Installation
Add the InsForge MCP server to your Kiro:- Select Kiro in the dropdown list
-
Copy and paste the following installation command in your Kiro terminal
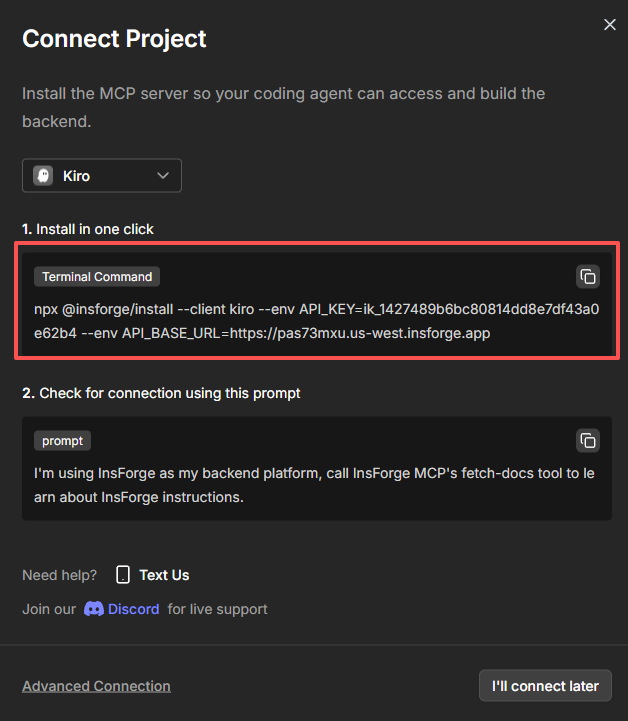
- Run the command
Verify installation
To verify the connection, start a new chat session in Kiro and send this prompt to your agent:Codex
Codex
Installation
Add the InsForge MCP server to your Codex:- Select Codex in the dropdown list
-
Copy and paste the following installation command in your terminal

- Run the command
Verify installation
To verify the connection, start a new chat session in Codex and send this prompt to your agent:Cline
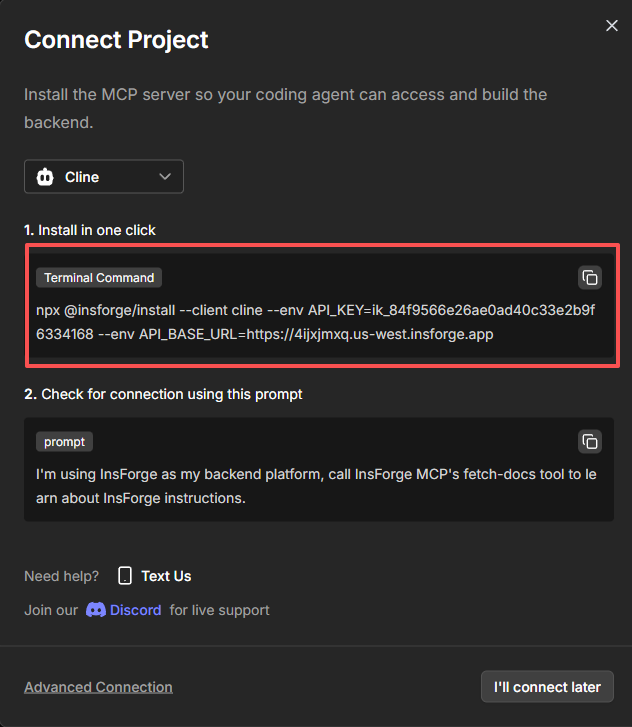
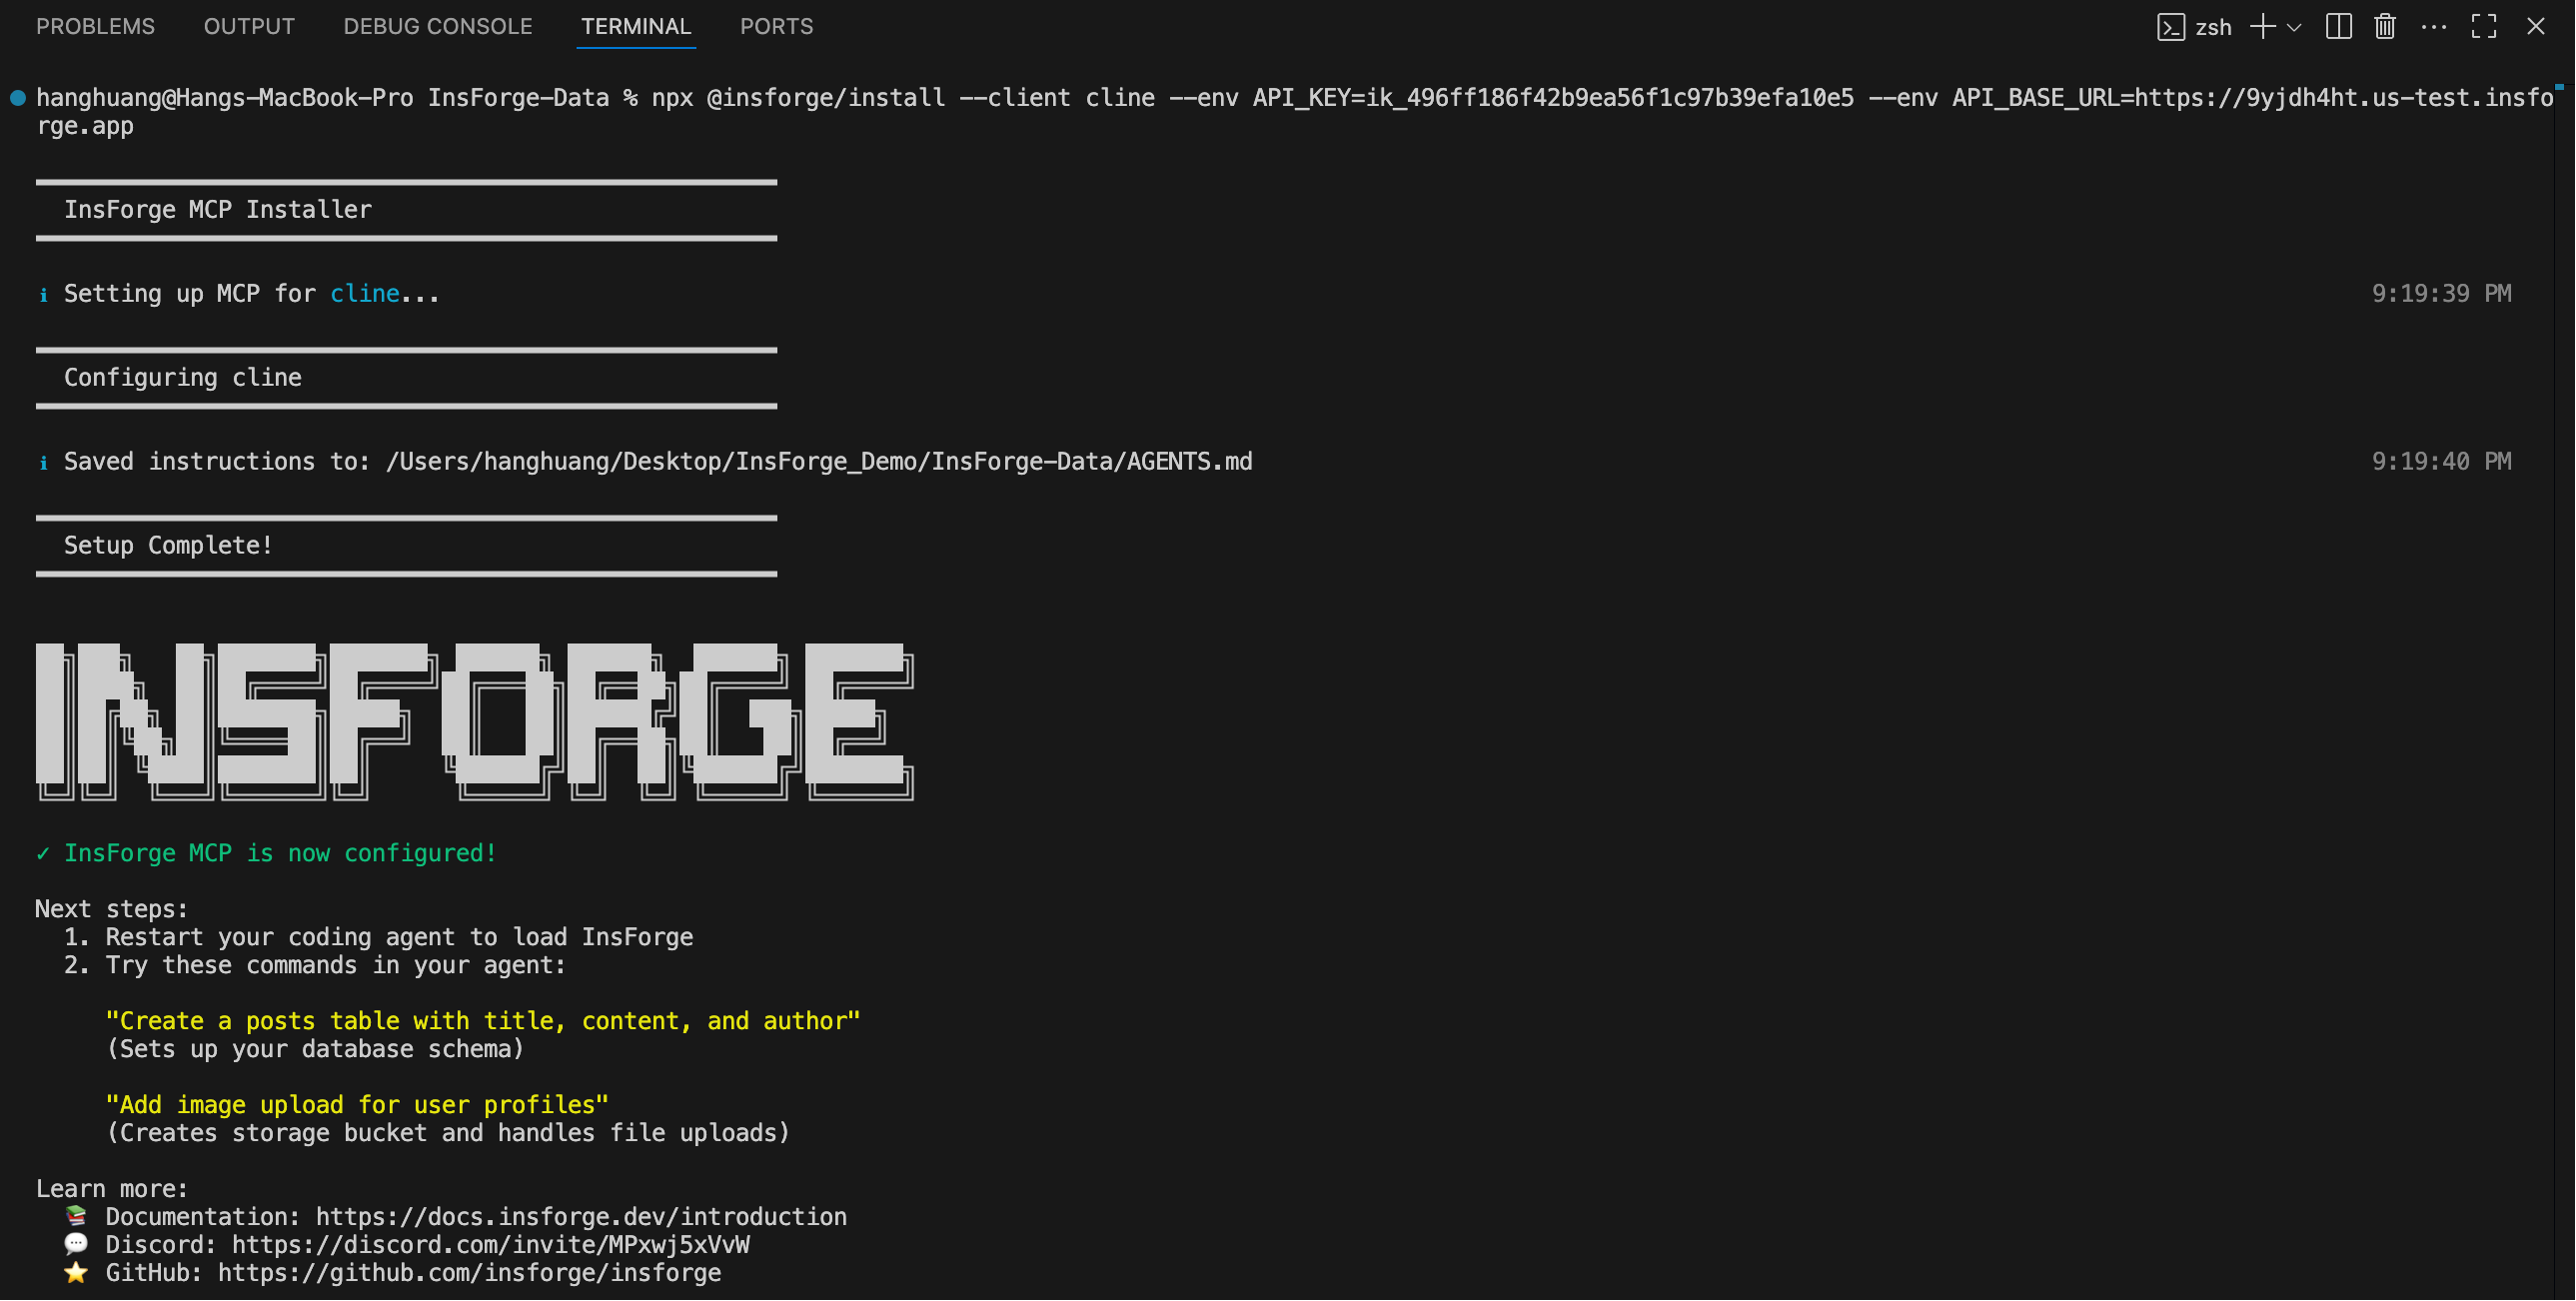
Cline
Installation
Add the InsForge MCP server to your Cline:- Select Cline in the dropdown list
-
Copy and paste the following installation command in your Cline terminal
-
Run the command
Verify installation
To verify the connection, start a new chat session in Cline and send this prompt to your agent:Windsurf
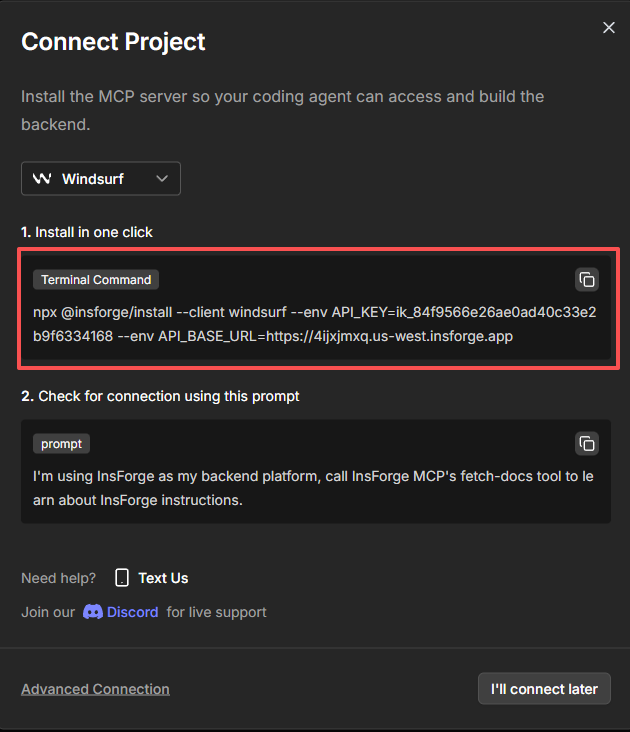
Windsurf
Installation
Add the InsForge MCP server to your Windsurf:- Select Windsurf in the dropdown list
-
Copy and paste the following installation command in your Windsurf terminal
- Run the command
Verify installation
To verify the connection, start a new chat session in Windsurf and send this prompt to your agent:Trae
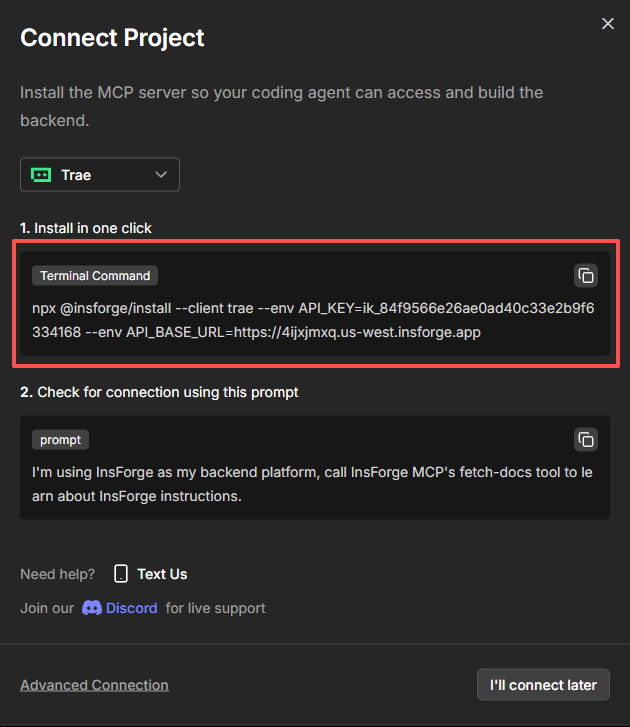
Trae
Installation
Add the InsForge MCP server to your Trae:- Select Trae in the dropdown list
-
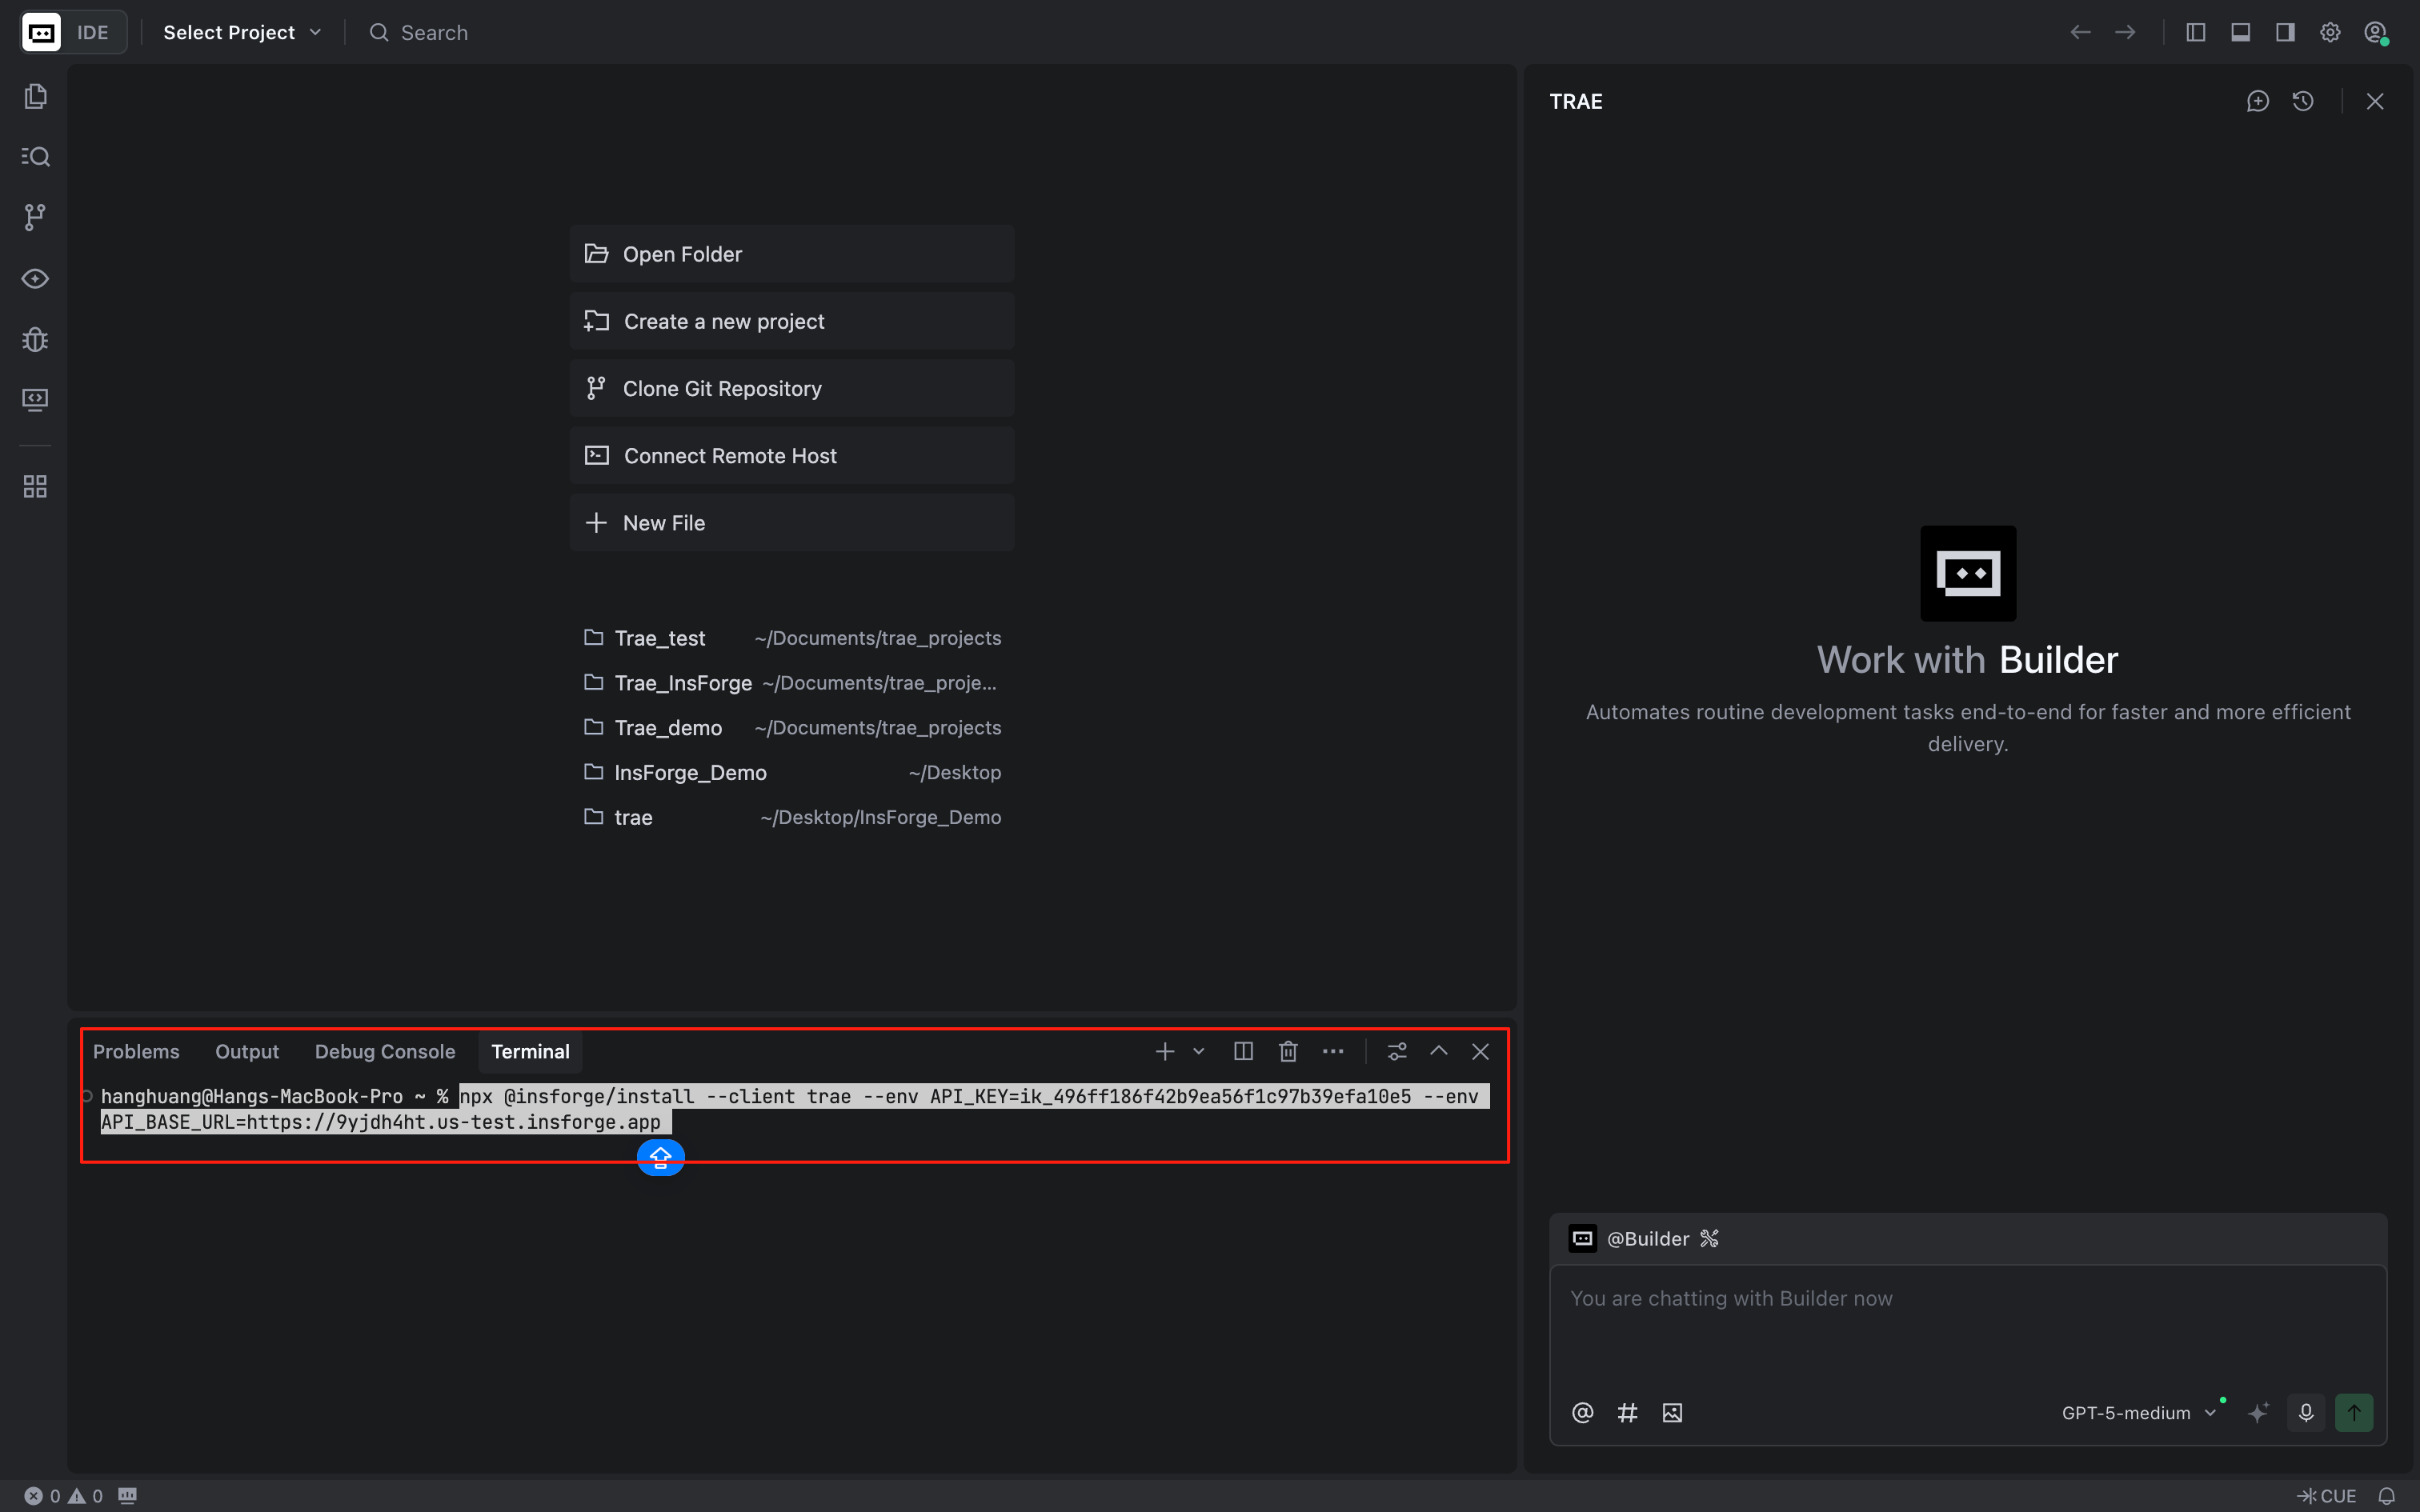
Copy and paste the following installation command in your Trae terminal
-
Run the command
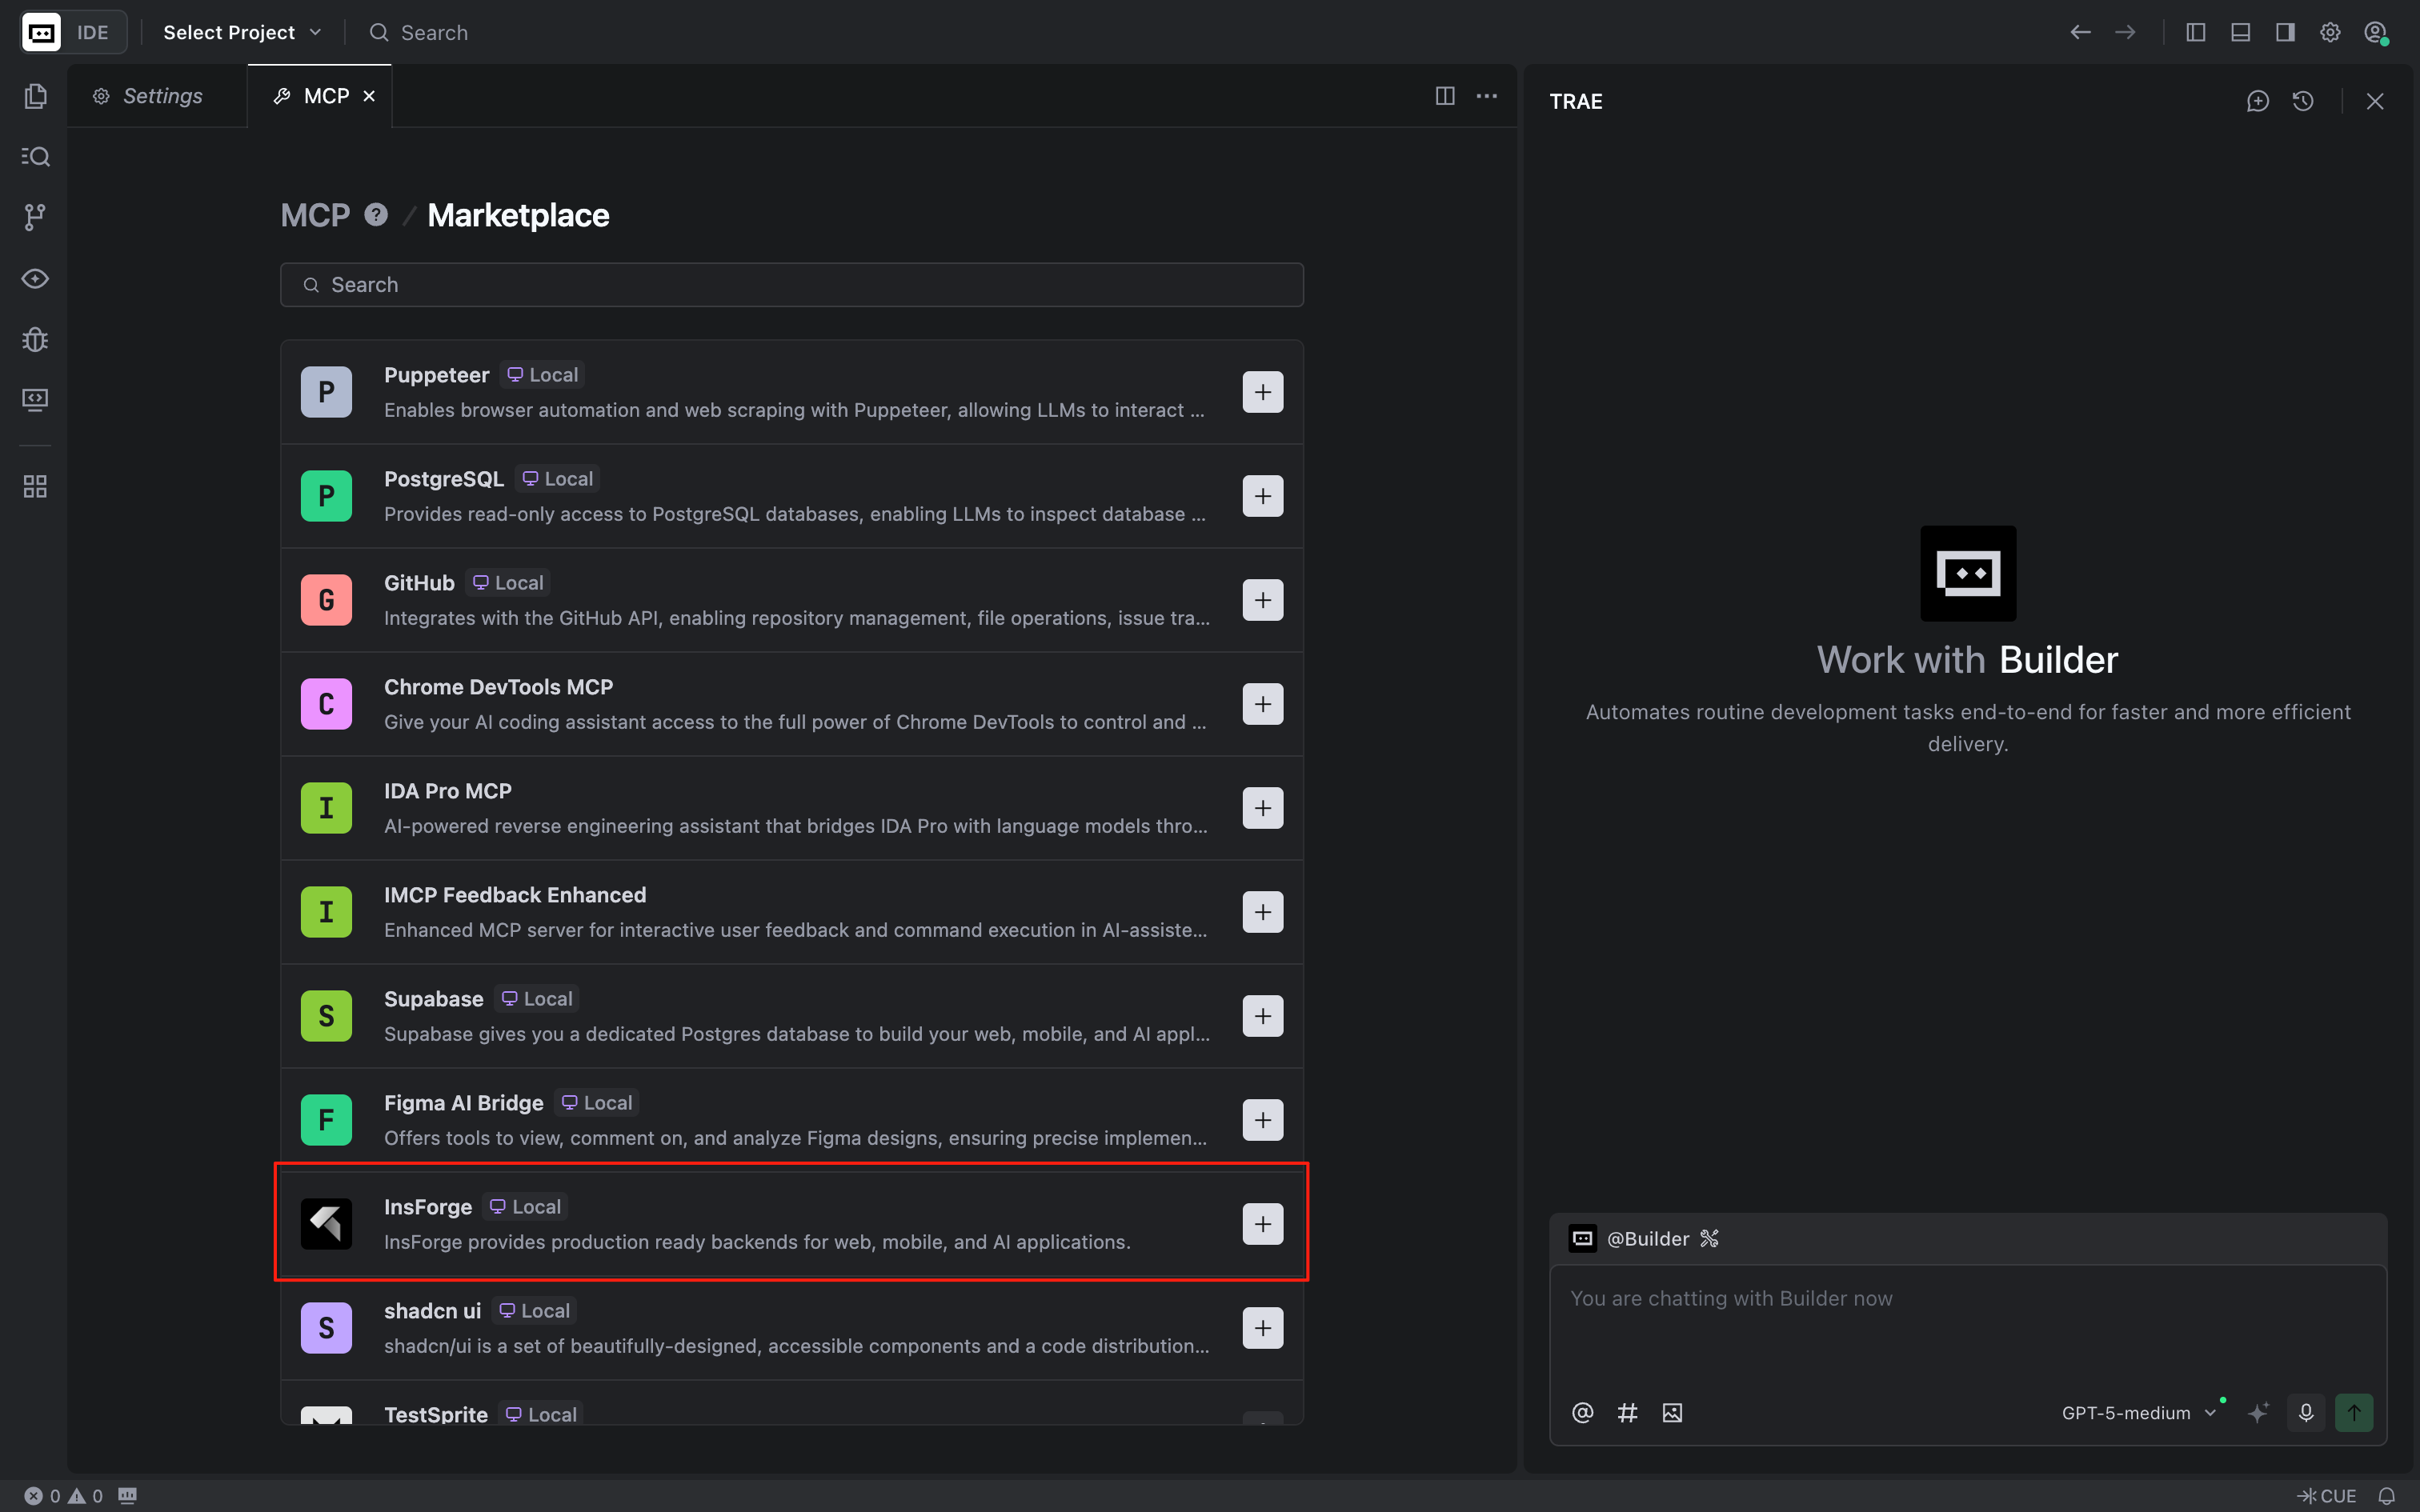
- Open Trae’s Settings → navigate to MCP
- Click on Add and then select Add from Marketplace
-
Search “InsForge” and add it from the marketplace
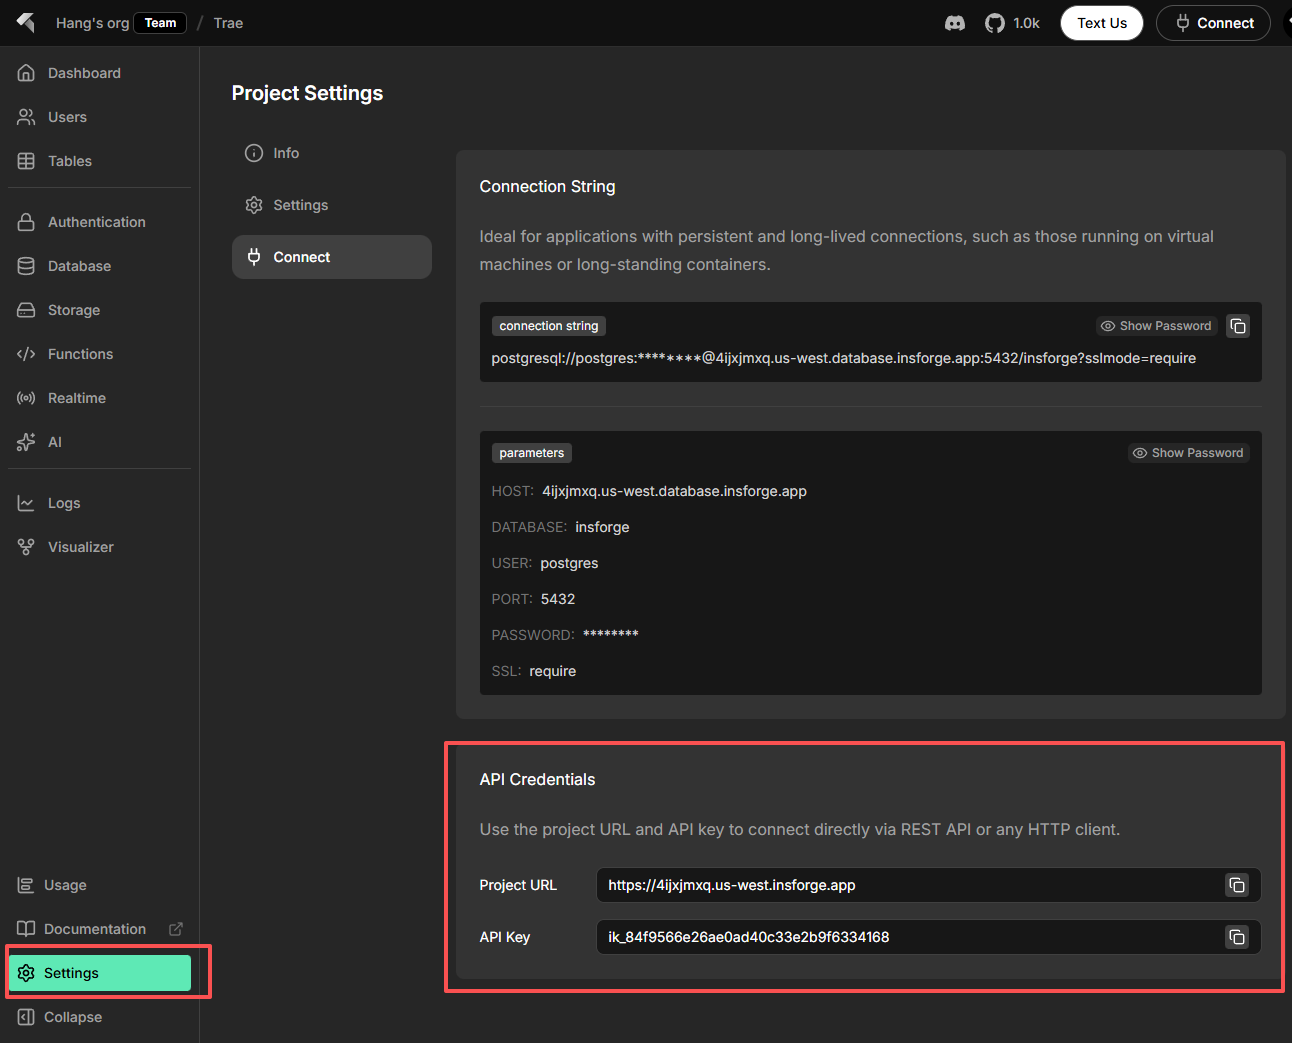
-
For required credentials API_KEY and API_BASE_URL, you can find them in your InsForge Settings, under the Connect tab.
Verify installation
To verify the connection, start a new chat in Trae and send this prompt to your agent:Qoder
Qoder
Installation
Add the InsForge MCP server to your Qoder:- Select Qoder in the dropdown list
-
Copy and paste the following installation command in your Qoder terminal
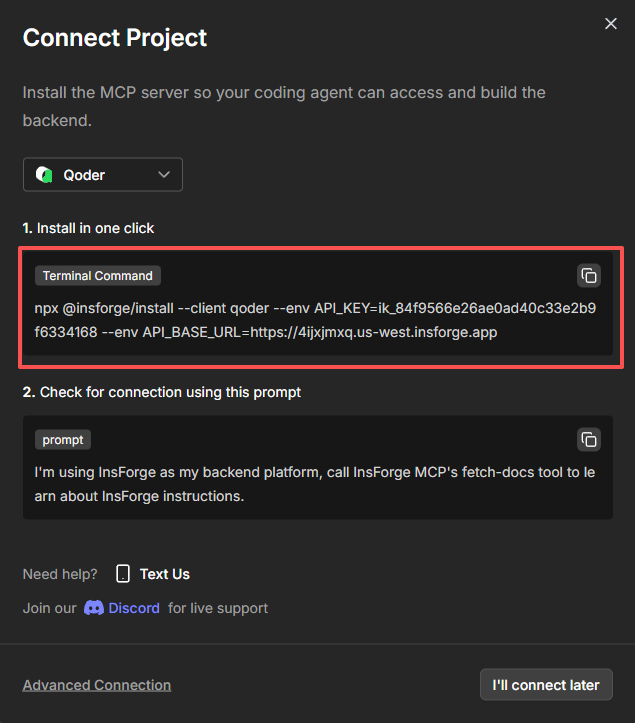
- Run the command
Verify installation
To verify the connection, start a new chat session in Qoder and send this prompt to your agent:Roo Code
Roo Code
Installation
Add the InsForge MCP server to your Roo Code:- Select Roo Code in the dropdown list
-
Copy and paste the following installation command in your Roo Code terminal
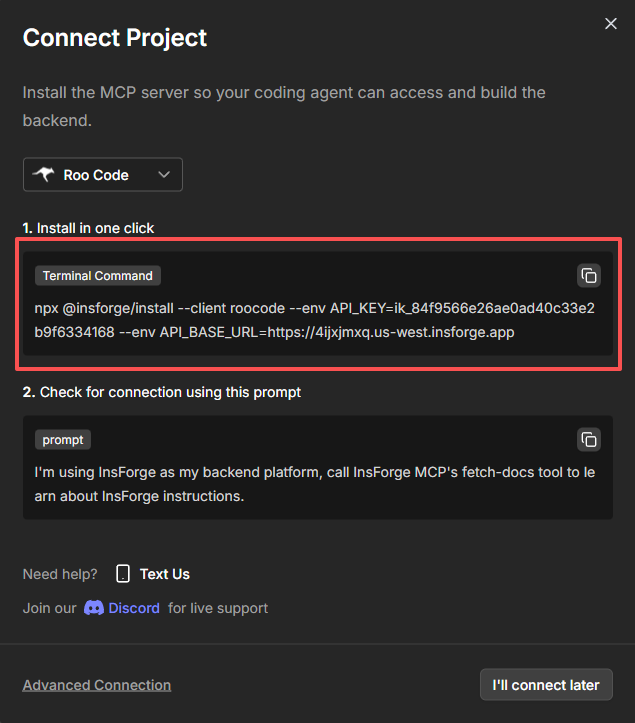
- Run the command
Verify installation
To verify the connection, start a new chat session in Roo Code and send this prompt to your agent:OpenCode
OpenCode
Installation
Add the InsForge MCP server to your OpenCode:- Select OpenCode in the dropdown list
-
Copy and paste the following installation command in your terminal
- Run the command
Verify installation
To verify the connection, start a new chat session in OpenCode and send this prompt to your agent:MCP JSON
MCP JSON
Installation
Add the InsForge MCP server to your coding agent with MCP JSON:- Select MCP JSON in the dropdown list
-
Copy and paste the following MCP JSON configuration in your agent
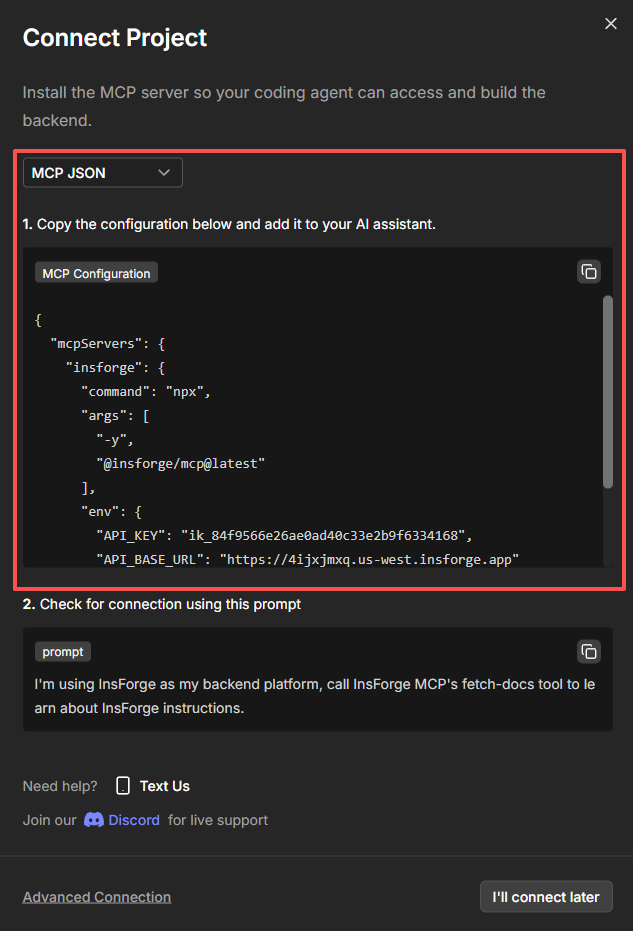
Verify installation
To verify the connection, start a new chat session and send this prompt to your agent:Remote MCP
The fastest way to get started is with Remote MCP. A single command attempts installation and tries to handle authentication and project binding. The command may still prompt you for manual steps if the automatic flow cannot complete. Run the following command in your terminal:The
add-mcp command works for most coding agents, but not all. Currently it supports:
Claude Code, Claude Desktop, Codex, Cursor, Gemini CLI, Goose, GitHub Copilot, OpenCode, VS Code, Zed.Connect and bind project
Some MCP clients automatically prompt you to log in during setup. Others may require manual authentication or project binding steps if the automatic flow cannot complete. Either way, authentication opens a browser window where you can log in to your InsForge account and grant organization/project access to the MCP client.Cursor
Cursor
You can find the configuration file in In menu Preferences → Cursor Settings → Tools & MCP, you should see InsForge MCP server is added successfully.
If the InsForge MCP server shows the status “Needs authentication”, click the
.cursor/mcp.json as below:connect button to authenticate.Claude Code
Claude Code
After installation, you will find the configuration file in Then in a regular terminal (not the IDE extension) run:Select the “insforge” server, then “Authenticate” to begin the authentication flow.
.mcp.json as below:GitHub Copilot
GitHub Copilot
After installation, you will find the configuration file in
.vscode/mcp.json as below:Google Antigravity
Google Antigravity
Add this configuration to Then restart Antigravity. It will auto-authenticate.
~/.gemini/antigravity/mcp_config.json:Gemini
Gemini
After installation, you will find the configuration file in Start the Gemini CLI and run the following command to authenticate the server:
.gemini/settings.json as below:Codex
Codex
If you are using Codex for the first time, you may need to enable the rmcp feature. To do so, add the following into your
~/.codex/config.toml file:.codex/config.toml as below:Cline
Cline
You can install the InsForge MCP server to your Cline by running the following command in your terminal:Alternatively, you can follow the official Cline documentation to add the InsForge MCP server with parameters:
- Server Name:
insforge - Server URL:
https://mcp.insforge.dev/mcp - Transport Type:
Streamable HTTP
Windsurf
Windsurf
Add this configuration to Windsurf does not currently support remote MCP servers over HTTP transport. You need to use the mcp-remote package as a proxy.
~/.codeium/windsurf/mcp_config.json:Roo Code
Roo Code
You can install the InsForge MCP server to your Roo Code by running the following command in your terminal:
OpenCode
OpenCode
After installation, you will find the configuration file in Then run the following command to authenticate:This will open your browser to complete the OAuth authentication flow.
./opencode.json as below:Verify installation
To verify the connection, start a new chat session in your AI coding assistant and send this prompt:Troubleshooting
Changes not taking effect
Changes not taking effect
Most AI clients require a full restart after MCP config changes. Close and reopen the application.